5-Day Physical Product Design Sprint (With Agenda Template)
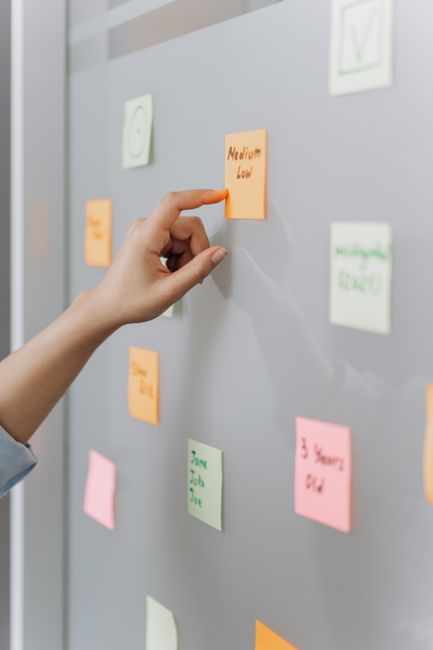
Table of Contents
- The 5-Day Blueprint for Hardware Co-Creation
- Why Traditional Sprints Fail for Physical Goods
- Adapting the 5-Day Framework for Atoms, Not Pixels
- Pre-Sprint Logistics: What Must Be Ready Before Day 1
- The 5-Day Physical Product Sprint Agenda Template
- Sources & Further Reading
The 5-Day Blueprint for Hardware Co-Creation
A physical product design sprint compresses months of traditional R&D into a single 5-day cycle. You achieve this speed by aligning engineering, industrial design, and marketing around a tangible, low-fidelity prototype. According to Jake Knapp’s seminal book Sprint, rapid prototyping prevents costly downstream alignment failures by forcing decisions early.
Unlike software sprints that focus on digital pixels, physical product innovation must navigate the friction of atoms. You cannot simply rewrite a line of code when a physical mechanism fails a drop test. This friction demands a fast shift from digital concepts to physical form factors, requiring early cross-functional validation of hardware boundaries.
This raises a critical challenge: How do you fit 3D modeling, supply chain realities, and physical safety testing into a standard five-day timebox without burning out your team? To bypass this bottleneck, you must run structured Co-Creation Workshops for Product Innovation to align your engineering constraints with market desires. You also need to integrate compliance checkpoints, such as Sustainable Product Design Innovations, directly into the daily sprint milestones.
A study from the McKinsey Design Index shows that companies using iterative physical prototyping launch products up to 40% faster. Furthermore, research on collaborative business frameworks published in the Harvard Business Review shows that involving cross-functional stakeholders early reduces late-stage engineering changes by 50%. This structural shift is achieved by applying rigorous Design Thinking for Product Development principles to hardware engineering.
Using a disciplined schedule prevents team fatigue while maintaining manufacturing feasibility. You must adapt standard agile frameworks into a hardware-specific timeline to keep the sprint on track. To implement this immediately in your next development cycle, use the structured blueprint below.
Copy-Paste Template: 5-Day Hardware Sprint Agenda
DAY 1: MAP AND ALIGN
- 09:00 - 10:30: Define the Long-Term Goal and Hardware Constraints
- 10:30 - 12:00: Map the Customer Journey and Product Touchpoints
- 13:00 - 15:00: Ask the Experts (Engineering, Manufacturing, Supply Chain)
- 15:00 - 17:00: Select the Target Component for the Sprint

DAY 2: SKETCH AND SOLVE
- 09:00 - 10:30: Review Existing Solutions and Material Inputs
- 10:30 - 12:30: Lightning Demos (Analogous physical mechanisms)
- 13:30 - 16:00: Sketching (Crazy Eights for physical form factor)
- 16:00 - 17:00: Document Bill of Materials (BOM) for Day 4 Prototyping

DAY 3: DECIDE AND PLAN
- 09:00 - 11:30: Sticky Decision (Structured critique of sketches)
- 11:30 - 12:30: Choose the Winning Concept
- 13:30 - 15:00: Form Factor Storyboard (User interactions and physical touchpoints)
- 15:00 - 17:00: Procurement Check (Validate material availability with supply chain)

DAY 4: PROTOTYPE (THE ATOM FACTORY)
- 09:00 - 12:00: Low-Fidelity Fabrication (3D printing, foam core, or cardboard)
- 13:00 - 15:30: Assembly and Fit Testing (Integrate electronic/mechanical components)
- 15:30 - 17:00: Trial Run (Dry run of physical testing protocol)

DAY 5: TEST AND VALIDATE
- 09:00 - 12:00: User Testing Sessions (Target customers interact with low-fi model)
- 13:00 - 15:00: Stress Testing and Regulatory Feasibility Review
- 15:00 - 17:00: Debrief and Action Plan (Go/No-Go decision for tooling)
With this blueprint in place, the immediate priority becomes managing the team’s cognitive load during the high-stakes mapping phase. Let’s look at how to run the high-pressure mapping sessions on Day 1 without getting bogged down in engineering jargon…
Why Traditional Sprints Fail for Physical Goods
You cannot copy-paste the classic Google Ventures (GV) sprint template—originally detailed in Jake Knapp’s bestselling book Sprint—into a physical product pipeline. Software prototypes require zero tooling costs and deploy instantly, whereas hardware development involves physical atoms, tooling lead times, and supply chain constraints. According to a McKinsey & Company study on the business value of design, hardware projects that fail to define manufacturing constraints early experience up to a 40% launch delay.
To avoid these bottlenecks, teams must adapt their frameworks by integrating Design Thinking for Product Development to account for material limitations from day one. You must design for the assembly line, not just the screen. This shifts your sprint goal from "how does it look" to "how do we scale."
Isolating your industrial designers from your manufacturing and mechanical engineers during a sprint creates a costly "silo penalty." Designers sketch beautiful, organic forms that are impossible to injection-mold or assemble. Engineers then spend weeks correcting these errors, completely erasing the sprint’s time-saving benefits.
To solve this, run cross-functional Co-Creation Workshops for Product Innovation where engineers and designers sketch together at the same table. In The Design of Everyday Things, author Don Norman emphasizes that usability and technical execution must be co-developed. This integration ensures you build a viable path to production while maintaining Agile Product Development for Innovation principles.
Physical sprints also fail when teams mistake mechanical perfection for user-interaction value. You do not need a working, custom-printed circuit board to test a new handheld medical device on day five. You need a 3D-printed shell or a weighted foam model to test ergonomics, grip, and weight distribution.
Harvard Business School professor Stefan Thomke, in his research on the discipline of business experimentation, notes that high-fidelity prototypes built too early actively block creative feedback because users hesitate to criticize a seemingly finished item. Keep your mechanical prototypes low-fidelity to keep your feedback high-quality. Prioritize how the user holds, touches, and feels the product over the internal mechanism.
Frequently Asked Questions
How do physical product sprints differ from software sprints?
Software sprints focus on digital flows and user interfaces. Physical product sprints must solve for ergonomics, material limits, and manufacturing realities. If you need a faster starting point for planning, check out this 60-Minute Remote Innovation Sprint: Agenda (With Template) to align your remote teams.
How can we address environmental impact during a rapid hardware sprint?
You must incorporate circularity constraints into the sprint’s initial parameters. Integrating Sustainable Product Design Innovations during the ideation phase prevents the selection of materials that cannot be recycled or easily disassembled.
Now that you understand why traditional sprints fail, you must restructure the five-day calendar to accommodate the physical world. Let’s look at the exact hourly agenda required to turn physical constraints into market advantages.
Adapting the 5-Day Framework for Atoms, Not Pixels
Traditional design sprints developed by Jake Knapp at Google Ventures solve digital problems. But digital mockups do not have to contend with gravity, material fatigue, or customs delays. When your product consists of atoms rather than pixels, you must adjust the classic five-day timeline to account for physical constraints.
- Frontload Constraints: Map your Bill of Materials (BOM) and lead times on Day 1 to avoid designing unmanufacturable concepts.
- Parallel Prototyping: Use Days 3 and 4 to run parallel tracks for look-alike foam models and act-alike digital twins.
- Simultaneous Collaboration: Colocate industrial design, mechanical engineering, and procurement to compress decision loops from weeks to minutes.
Adapting this timeline requires shifting from linear tasks to parallel engineering. You cannot wait until Day 5 to realize your custom casing takes six weeks to tool. By blending Design Thinking for Product Development with rapid industrial cycles, you validate hardware at software speeds.
Days 1-2: Mapping the Reality of the Supply Chain
On Day 1, your map must go beyond the user’s digital journey. You must plot the physical lifecycle, from raw materials to assembly and shipping. The Product Development & Management Association (PDMA) Handbook notes that up to 80% of a product’s manufacturing cost is locked in during these initial design phases.
To control these costs, integrate your Bill of Materials (BOM) directly into the Day 1 mapping session. If your concept requires a custom microprocessor with a 24-week lead time, you flag it immediately. This allows your team to pivot to off-the-shelf components before sketching starts on Day 2.
Applying Agile Product Development for Innovation means treating your supply chain as a design parameter. On Day 2, when sketching solutions, team members must adhere to strict component budgets and physical dimensions. You do not sketch a sleek, ultra-thin enclosure if procurement reveals that the only available battery is 12 millimeters thick.
Days 3-4: High-Velocity Physical Prototyping
Day 3 is about deciding on a direction, but Day 4 requires a fundamental shift in how you build. You cannot write code to simulate the hand-feel of a physical tool. Instead, you split your prototyping team into two parallel tracks: look-alike models and act-alike models.
Your look-alike team uses high-density blue foam, CNC milling, and fast Fused Deposition Modeling (FDM) 3D printing to iterate physical forms. According to insights on prototyping strategy in Harvard Business Review’s analysis of agile hardware development, physical prototypes drastically reduce cognitive errors in design assessment. Meanwhile, your act-alike team programs off-the-shelf microcontrollers like Arduino or Raspberry Pi to simulate the product’s actual functionality.
Simultaneously, you leverage virtual testing. By utilizing AI Design Thinking for Industry 4.0: Faster Innovation, you can build digital twins to test thermal and mechanical stresses in real time. This combined physical-digital prototype ensures that you have a high-fidelity model ready for user testing by the end of Day 4.
The Cross-Functional Core: Simultaneous Engineering
To achieve this pace, you must abandon the traditional hand-off model. In a hardware sprint, industrial designers, mechanical engineers, and procurement specialists sit in the same room. They collaborate in structured 90-minute blocks to make immediate trade-offs.
For example, when an industrial designer proposes a seamless curved edge, the mechanical engineer immediately runs a draft analysis. Simultaneously, the procurement specialist checks the availability of recyclable polymers to align with Circular Design Strategies for Product Longevity. This immediate feedback loop prevents the wasted effort of detailing designs that cannot be sourced or manufactured.
These fast-paced Co-Creation Workshops for Product Innovation keep the entire business aligned. By Friday morning, you do not just have a pretty plastic shell; you have a validated, cost-estimated, functionally sound prototype.
But how do you put this complex physical asset in front of real users on Day 5 without risking your intellectual property or breaking your testing budget?
Pre-Sprint Logistics: What Must Be Ready Before Day 1
Physical design sprints fail because of missing $5 parts, not a lack of ideas. If your team sits idle on Wednesday waiting for a 3D printer filament delivery, your sprint is dead. You must secure every physical material, assemble the right team, and narrow your scope before the clock starts on Day 1.
The Hardware Procurement Checklist
According to the Product Development and Management Association (PDMA) Handbook, supply chain delays disrupt 35% of early-stage physical prototyping schedules. To avoid this, buy all materials 14 days before the sprint. Use this exact procurement list:
- Modeling Mediums: 5 kg of industrial styling clay, 10 sheets of 5mm foam-core, and 5 boxes of quick-setting epoxy.
- Additive Manufacturing: 3 spools of PLA filament and 2 spools of TPU flexible filament for your in-room 3D printers.
- Modular Electronics: 3 Arduino Uno starter kits, 2 Raspberry Pi 4 boards, and an assortment of basic breadboards, jumper wires, and analog sensors.
Having these materials on hand allows you to practice Design Thinking for Product Development without interruption. Make sure one team member is designated as the "Lab Manager" to organize these tools before Monday morning.
Selecting the Cross-Functional Squad
A physical sprint requires a highly specialized team configuration. Research on team dynamics by Harvard Business School professor J. Richard Hackman indicates that five to nine people is the optimal size for fast-paced, collaborative tasks. For a hardware sprint, you need exactly seven people with these specific roles:
- Mechanical Engineer (1): To validate physical mechanisms and structural integrity.
- Electrical/Firmware Engineer (1): To handle sensors, wiring, and basic code.
- Industrial Designer (1): To drive the aesthetic, form factor, and physical ergonomics.
- UX/Interaction Designer (1): To map any physical-digital touchpoints.
- Marketer/Product Manager (1): To protect the business model and customer viability.
- The Decider (1): A VP of Product or Lead PM with absolute budget authority to break stalemates.
- Domain Expert (1): A regulatory specialist or manufacturing engineer to prevent unfeasible designs.
This specific ratio ensures that your co-creation workshops for product innovation remain grounded in reality. Do not allow extra observers in the room; they dilute focus and slow down decision-making.
Setting the Boundary Conditions
You cannot design an entire physical medical device or automotive console in five days. You must scope the sprint to a single high-risk mechanism or touchpoint. McKinsey & Company’s Business Value of Design report shows that companies that tightly integrate physical-digital touchpoints launch products up to 40% faster.
To achieve this, establish clear boundary conditions. If you are designing a smart home hub, your sprint target should not be the entire product ecosystem. Focus only on the physical mounting bracket and the tactile feedback of the primary dial. By limiting the scope, your team can build a high-fidelity representation of that single feature for real-user testing.
The Nielsen Norman Group’s guide on paper prototyping emphasizes that low-fidelity physical models yield the same usability insights as high-fidelity models at a fraction of the cost. Use this principle to keep your sprint scope realistic.
What is your primary bottleneck for this hardware sprint?
If you are struggling to align engineering constraints with rapid design iteration cycles…
Adopt a hybrid hardware-software development model. Focus your sprint on creating quick, modular physical rigs that interface with simulated software. This allows you to deploy Agile Product Development for Innovation without waiting for custom PCBs to be manufactured.
If your product has complex physical-digital interfaces that must be accessible to everyone…
Prioritize ergonomic testing using foam-core and clay models. Focus the sprint specifically on the physical grip and reach zones. Read our guide on Designing for Accessibility in Product Innovation to establish your testing baselines.
If your biggest commercial risk is regulatory compliance, material sourcing, or physical sustainability…
Scope the sprint to evaluate alternative materials and assembly methods. Use the 5-day cycle to prototype disassembly mechanisms. Check out our strategies on Sustainable Product Design Innovations to select eco-friendly, compliant materials before you prototype.
Once you have locked down your materials, selected your seven-person squad, and defined your boundary conditions, you are ready to construct the hour-by-hour sprint schedule.
The 5-Day Physical Product Sprint Agenda Template
Physical product development moves slower than software. Tooling costs are high, and material errors are expensive. According to McKinsey & Company’s "Business Value of Design" report, companies that integrate physical, digital, and service design achieve double the revenue growth of their industry peers.
The standard digital design sprint must change to accommodate hardware realities. This 5-day hardware sprint template adapts Jake Knapp’s original Google Ventures framework specifically for physical constraints. It builds in manufacturing validation, material selection, and physical safety checks.
Day 1: Map, Scope, and Align
You cannot undo a steel injection mold. Day 1 focuses on establishing the physical boundary conditions of your product. You will map the user journey while defining the mechanical, electrical, and spatial constraints.
- 09:00 – 10:30: Expert Interviews & Spatial Mapping. Interview your lead engineer, manufacturing lead, and procurement specialist. Define the target envelope: size, weight, power, and cost constraints.
- 10:30 – 12:00: Customer Journey Mapping. Track how the user first interacts with the physical product, from unboxing to long-term storage. Align this map with proven Design Thinking for Product Development principles to identify critical touchpoints.
- 13:00 – 15:00: Bill of Materials (BOM) & Target Costing. Review current component costs. Define the maximum unit manufacturing cost (COGS) early to avoid designing a product you cannot afford to build.
- 15:00 – 17:00: Pick the Target. Select one specific physical interaction or sub-assembly to solve during the week. Attempting to prototype an entire complex machine in 5 days guarantees failure.
Day 2: Sketch and Ideate Form-Factors
Day 2 shifts from abstract constraints to concrete physical geometry. The goal is to generate diverse options for how the product looks, feels, and assembles.
- 09:00 – 10:30: Lightning Demos. Analyze competing physical products, packaging, and even unrelated consumer electronics. Look at fastening mechanisms, material finishes, and button configurations.
- 10:30 – 12:30: Component Architecture (The "Box" Exercise). Sketch different ways to arrange internal components (batteries, PCBs, motors) inside the outer housing.
- 13:30 – 15:30: Ergonomic Sketching. Focus on the human hand-held interface. Use basic anthropometric data to guide your grip diameters and button placements.
- 15:30 – 17:00: Crazy Eights for Physical UI. Sketch eight different tactile interfaces in eight minutes. Focus on physical dials, LED indicators, latch mechanisms, and tactile feedback.
Day 3: Decide and Validate Viability
Decisions must be made with manufacturing reality in mind. Day 3 includes a dedicated engineering review to filter out ideas that violate physical laws or supply chain constraints.
- 09:00 – 11:00: Art Gallery & Silent Voting. Post all Day 2 sketches on the wall. Team members place heat-map stickers on the most promising structural and aesthetic concepts.
- 11:00 – 12:30: The Decider’s Call. The product owner selects the winning concept. You may choose one core concept or a hybrid of two closely related ideas.
- 13:30 – 15:00: Engineering Sanity Check. Apply the Design for Manufacture and Assembly (DFMA) guidelines pioneered by Boothroyd and Dewhurst. Evaluate draft angles, wall thickness, assembly steps, and parting lines. This stage uses Agile Product Development for Innovation to quickly adapt design features to fit current manufacturing capabilities.
- 15:00 – 17:00: The Assembly Storyboard. Create a step-by-step storyboard showing how the prototype will be assembled on Day 4. List every tool, adhesive, 3D printer file, and raw material required.
Day 4: High-Velocity Prototyping
You are not building a production-ready device. You are building a facade that looks and feels real enough to elicit an honest reaction from a user.
- 09:00 – 12:00: Divide and Conquer. Split the team into three roles: the "Makers" (3D printing, foam carving, laser cutting), the "Asset Collectors" (purchasing off-the-shelf parts, buttons, weighted plates), and the "Scribes" (writing the testing script).
- 12:00 – 13:00: Fit-Up Check. Conduct a midday assembly test. Ensure internal electronics fit into the 3D-printed or foam-cut enclosures without pinching wires.
- 13:00 – 16:00: Surface Finish & Weighting. Apply weighted plates inside the prototype to match target production weight. A light prototype feels cheap and skews user perception. Incorporate Sustainable Product Design Innovations by selecting recyclable polymers or bio-based prototyping boards where possible to assess material circularity.
- 16:00 – 17:00: Dry Run. Test the physical prototype with an internal team member. Confirm that the latch moves, the buttons click, and the weight distribution feels correct.
Day 5: Physical Interaction Testing
Day 5 is about observing physical behavior, not just listening to user opinions. Watch how users hold, drop, open, and manipulate your prototype.
- 09:00 – 12:00: Morning Testing Sessions. Run three 45-minute 1-on-1 user interviews. Position one camera on the user’s face and another close-up camera directly on their hands.
- 13:00 – 15:00: Afternoon Testing Sessions. Complete the final two user interviews. Watch for moments of physical hesitation, awkward grips, or excessive force used on moving parts.
- 15:00 – 17:00: Matrix Synthesis & Next Steps. Group the feedback by ergonomics, aesthetics, utility, and durability. Determine whether to advance to high-fidelity engineering, run a pivot sprint, or shelve the concept.
To keep your team organized during the critical testing phase, use this structured facilitation guide during Day 5.
Copy-Paste Template: Physical Product User-Testing Interview Script
[SESSION SETUP]
- Ensure the desk is clear of all materials except the prototype.
- Set up hand-level camera to record physical manipulation.
- Place a scale, a ruler, and the prototype under a cover cloth on the side.

[SECTION 1: INTRODUCTION AND ERGONOMIC BASELINE (10 MINUTES)]
"Thank you for joining us. Today we are testing a physical prototype of [PRODUCT NAME]. It is a non-functioning model made to test weight, size, shape, and general setup. Please handle it freely. Do not worry about breaking it."

"Before I hand it to you, tell me about your current [PRODUCT CATEGORY]. How heavy is it? Where do you store it when not in use?"

[SECTION 2: THE UNVEILING AND FIRST IMPRESSIONS (10 MINUTES)]
"I am going to uncover the prototype now. Do not touch it yet."
[UNCOVER THE PROTOTYPE]
"Just by looking at it:
- What do you think this product does?
- What material do you think this is made of?
- Where do you expect the heaviest part of the device to be?"

[SECTION 3: TACTILE AND ERGONOMIC EVALUATION (20 MINUTES)]
"Please pick up the prototype now."
[OBSERVE AND RECORD: How does the user pick it up? One hand or two? Where do their fingers rest naturally?]
"How does the weight feel compared to your expectations?"
"Show me how you would hold this to use it for [PRIMARY USE CASE]."
"Find the main [BUTTON/DIAL/LATCH]. Try to operate it."
[OBSERVE AND RECORD: Do they struggle to reach it? Do they use their thumb or index finger?]
"On a scale of 1 to 5, where 1 is highly uncomfortable and 5 is effortless, rate the comfort of this grip."

[SECTION 4: ASSEMBLY AND COMPONENT INTERACTION (15 MINUTES)]
"Now, I would like you to [PERFORM TASK: e.g., open the battery hatch / adjust the handle / plug in the cable]."
[OBSERVE AND RECORD: Do they look for instructions? Do they pinch their fingers? Do they use excessive force?]
"Tell me what you felt when you tried to [TASK]. Did you feel a click? Did you know it was locked in place?"

[SECTION 5: DEBRIEF AND RETURN (5 MINUTES)]
"You can place the prototype back on the table."
"If you could change one physical detail about this device—its size, its texture, its weight, or its controls—what would it be?"
"Thank you for your feedback. This completes our session."
Developing physical goods requires preparing your workspace with specific tooling, safety gear, and material inventories before Day 1 begins.
Sources & Further Reading
You have likely stared at a half-cured SLA resin prototype at 2 AM, wondering how to compress a standard 18-month hardware cycle into a single workweek. To bridge the gap between digital speed and physical reality, this agenda adapts the classic prototyping methodology pioneered by Jake Knapp, John Zeratsky, and Braden Kowitz in their seminal book Sprint. By structuring the physical constraints of manufacturing into discrete daily goals, you bypass the typical months of design-iteration friction.
Our hardware validation protocols are built on the foundational engineering workflows outlined in Karl T. Ulrich and Steven D. Eppinger’s classic textbook Product Design and Development. By combining these structured engineering disciplines with modern agile processes, you target the 56% higher shareholder returns that McKinsey & Company identified in design-led physical product manufacturers.
To successfully run this cross-functional agenda, your team must balance the raw empathy of human-centered design with the uncompromising realities of supply chain tooling. To dive deeper into the empirical frameworks and industrial history that make this hybrid sprint approach work, explore the foundational literature below.
- Jake Knapp, John Zeratsky, & Braden Kowitz, Sprint: How to Solve Big Problems and Test New Ideas in Just Five Days, Simon & Schuster, 2016. Establishes the core 5-day rapid prototyping and testing process that we adapt for physical hardware constraints.
- Karl T. Ulrich & Steven D. Eppinger, Product Design and Development, McGraw-Hill, 2020. Provides the definitive, structured engineering framework for cross-functional phase-gate development and physical architecture decisions.
- McKinsey & Company, The Business Value of Design, 2018. A landmark study of 300 global companies tracking how physical, digital, and service design integration directly drives business growth.
- Don Norman, The Design of Everyday Things, Basic Books, 2013. Grounds our physical prototyping testing phase in cognitive psychology, ergonomics, and physical affordance theory.
- Hirotaka Takeuchi & Ikujiro Nonaka, "The New New Product Development Game", Harvard Business Review, 1986. The seminal paper on overlapping, cross-functional product development that originally inspired agile methodologies. Available at Harvard Business Review.
Now that your research foundation is secure, it is time to look at the exact hourly breakdown of Day 1, where your cross-functional team will first clash over what is technically feasible versus what is actually desirable.
Featured image by Mikhail Nilov on Pexels